Sunday, June 24, 2007

It's starting to look like something.

Alright, I hauled my tins over to my Pop's place and put them on the frame and took a pics.

100_0386

Damn it is coming together piece by piece.

I snagged some seat springs off my sister's beach cruiser seat for a few hours just to see if they would work. And they hold up very well. Now to see if I can find a set cheap locally. Or even snag a seat at a yard sale.

100_0387

I had sat on it fairly carefully. I did bounce it a bit and it held me up for a few of them. Then since the springs were just wedged under the seat, one had to ping off into the yard. But all in all they work well.

100_0388

Now I need to figure out just how I am going to hold up the coils over the motor. I have a couple of ideas though.

And I did a bit more work on the girder parts. I am positive that I need a machinist now. All I have to do is come up with cash.

Saturday, June 23, 2007

If it wasn't for bad luck

Some days you wake up with with the Midas touch and other days you wind up being Midas in a alternate reality.

You know, the one where you touch anything and it turns to shit.

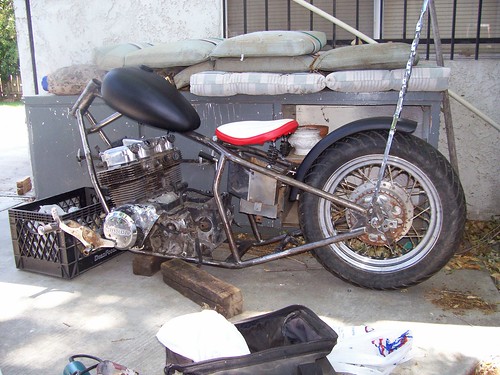
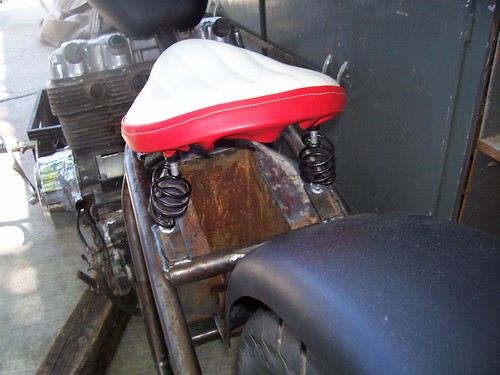
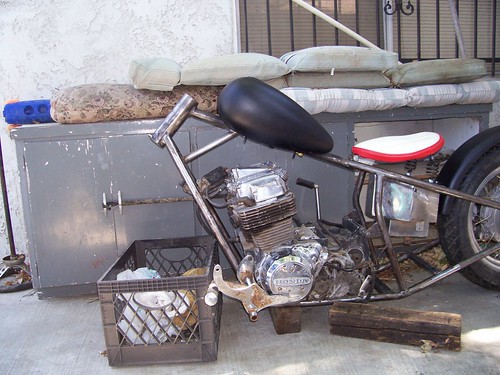
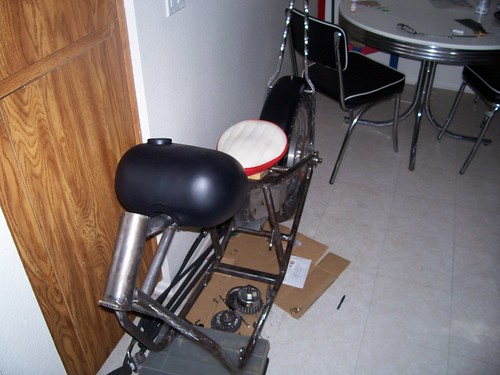
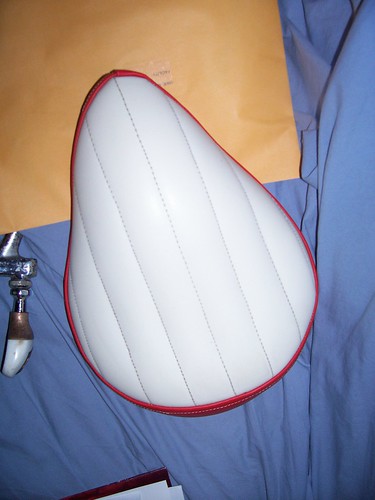
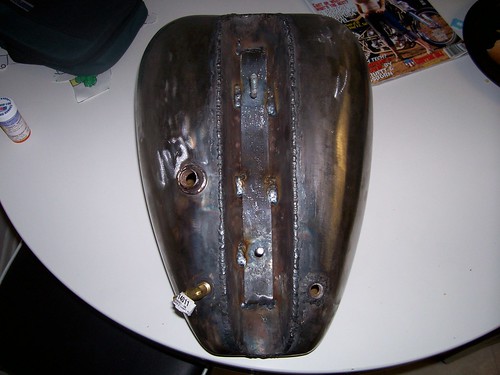
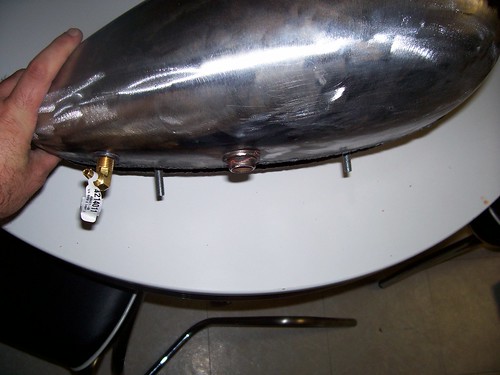
A few things went on yesterday. I shifted the mount back for the seat it will be aligned better with the seatpan area of the frame and also welded in some lower bungs for the springs. They are a bit wider at the frame side than at the seat. But I did that to keep the frame looking clean (cleaner?) than it would if I have mounted them out in perfect alignment.

Now I did get a wild hair and tried to make my own seat springs out of those hand exercisers. Which if I was about 40 pounds lighter might have worked better. As it was my ass flattened them out with out any movement left. And the second problem was that both were wound the same. So with the offset mounts the springs were binding up and causing troubles. Not really a big deal, I spent four dollars on them and had figured if they didn't work it wouldn't break the bank. Now I will have to go and buy a proper set and get them installed.

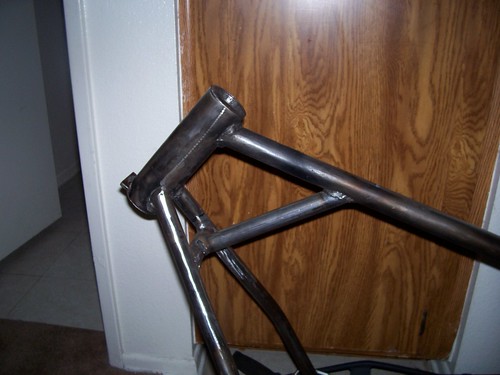
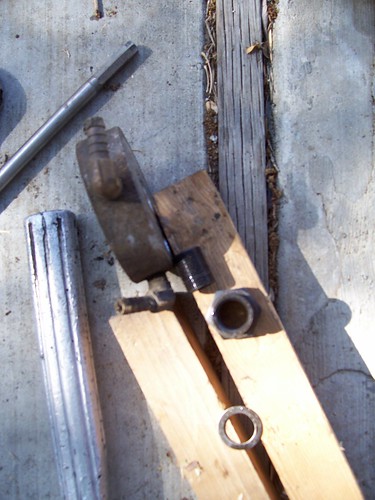
I also tried to repair the studs on my girder yesterday. And fucked them up. I had found some hardware that would be direct replacement in size and thread pitch for what I had to remove. But I got the bore off center and when I tried to force an alignment, I wound up knocking it off even further. So now my happy ass will have to take the whole thing off and start it from scratch. It is salvageable though. Thankfully it is salvageable.

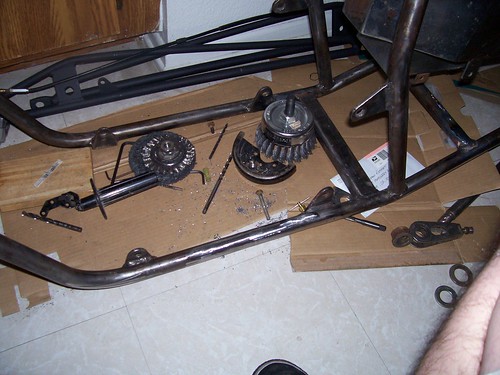
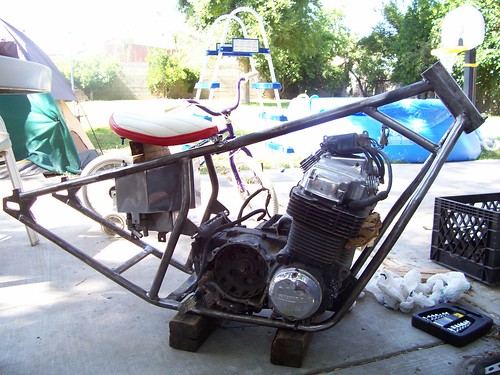
After the morning of fabrication disappointment, I hauled the frame over to where the motor is being stored.

The frame repairs came out sweet. All the mounts are lining up perfect, but I may have found the reason for the cracked rails. It appears that there is about 1/8" of gap from the mounts to the motor. And when I received the bike, the previous owner had just sucked up the gap.So they basically pre-stressed the frame. Now granted this may have taken years to accomplish, but I doubt that it was helpful to the situation.

Now the final round of irritation. I had asked about something I had seen on the front of the engine. Now I have taken cursory looks at the motor. Basically to see if it was turning, had compression and to check the shifting and trans operation. I had never flipped it over to inspect the underbelly. From a side glance it looked good. Well I began to flip it around to get a good and close inspection of the oilpan... What the hell?! No oil pan. So I need an oil pan for the bastard.

But I do have a nice oil cooler riser for the motor. Too bad I am guaranteed to not be able to keep any oil inside.

100_0380

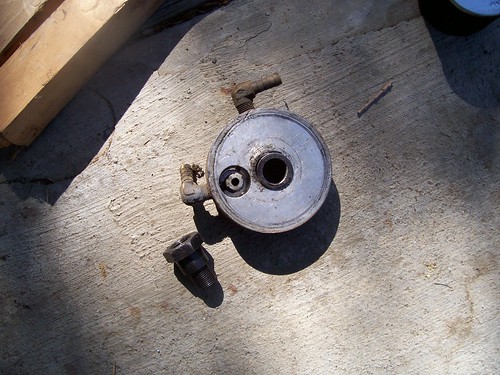
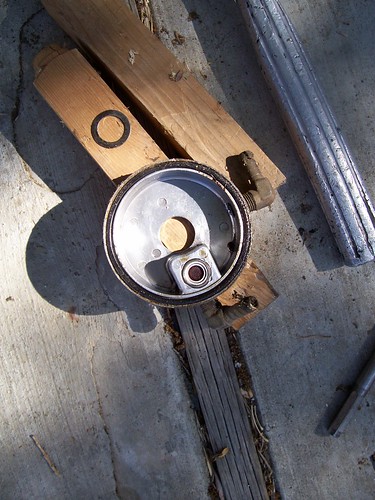
An interesting set up for the cooler. It is an aluminum riser with a pressure valve on the outlet half of the filter and came with a threaded nipple and a nut that acts like a coupler. I didn't find any markings on it though. So no idea who made this little fella.

100_0381

100_0382

I had no plans on using an oil cooler. Mainly because I don't want to buy the cooler so maybe I will do as I have done with other pieces I have not wanted, trade them for the things I do. Or even hock it off and use the proceeds to purchase what I need.

Right now the motor and frame are hanging out with each other. And I have some pics to figure out pipe placement and such.
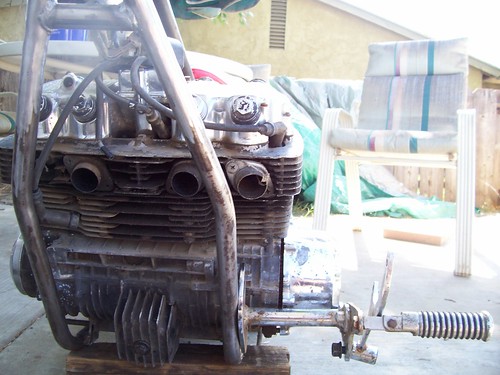
But look at this...

100_0383

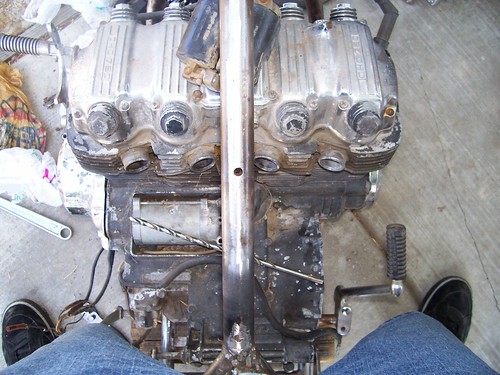
Talk about some serious width. That is a lot of motor. And as I keep looking at the bike, it is gonna be LOW. Four inches is not a lot of ground clearance. Depending on how that translates to riding fun, I may up my wheel sizes.

100_0377

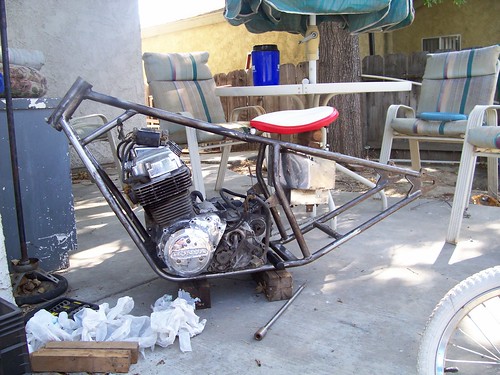
And I doubt that I am gonna have enough room to go with a 4-1 exhaust, so I will probably build 4-2 and split them to each side.

100_0378

I was worried that the pipes would get in the way of the forwards. Now that I mounted a side to it, I realize I am gonna have enough space to route it under them.

100_0385

Today if I have time after the Sunday chores I am going to take the tins down and fit them and get a few more pics of the bike and get a better idea on how it is going to look.

Sunday, June 17, 2007

Happy fucking Father's Day.

To anyone with a little monster or two jumping around.

Me I made my own Father's Day gift. I finished up the frame.

100_0372

The downtubes have been slugged and re-welded. Along with cross bars to replace those gussets that it did have. Thanks to Honda500Chopper on hondachopper.com, I had measurements that I could use to pretty well make sure I won't have to re-slug it again.

100_0373

Even got that mangled section at the bottom of the frame welded up and cleaned up. This is not easy work. Part of me began to think to myself "It would be a lot easier if I just cut the whole damn thing apart and began from scratch.

100_0374

Here it is with my fancy kitchen spray bomb and the bates seat from Armuss. It definitely looks a lot more comfortable than sitting on the oil tank. I am debating about the mount for the front of the seat. I used the mount that was already there. It just looks like it is too far forward. So I may cut it and move it back and inch two. That can wait until I have all the pieces to mount the seat. Still need tabs and springs. For the pic I just used my handy block for metal working.

100_0375

But I like that seat so far. The bike needed some color. I was talking with a guy that told me he could get a hold of some scrap tubing for my pipes from his work. Out of the cast off stuff of course. It would save some cash, considering I don't need much and all the places I've gone to, only sell them in full length runs.

It is getting close man. So close.

Saturday, June 16, 2007

You did what?!

I drank beer and fixed me some frame.

Lots of beer and lots of frame. Damn near 10 hours of it too.

I have it all together but the MIG decided to be a fuck and cause me some grief about halfway through the ordeal and once that was figured out I had lost some time. So tomorrow morning I will be back at it for an hour or so to get the finishing touches on it.

But for some other good news I do have pics of.

My seat came in today. Looks pretty sweet too. It will be the only color other than black on the entire bike.

100_0366

Tomorrow I am gonna take it with me and get it situated on the frame some.

And I also picked up a new jockey shift knob.

100_0368

Yesiree, I am gonna be fucking showing how much class I has got. Schlitz my friend. It may be cheap, it may be nasty, but it is good old American swill. And I think I will use this rather than the golf club. Maybe I will relegate the golf club to horn duty. BAM!

Friday, June 15, 2007

Good news, good news.

I got me some steel today!

Been dreading the hit to the wallet. Which has held me off from going and buying the stuff I need for the frame. But today I figured, "what the hell" and rolled over to a place nearby called KH Metals. Yeah I am plugging them. People were decent and I got my steel at $0.90 a lb. Granted that was out of the cast off pile. Though I got a good single piece that will be more than long enough for the repairs, so long as I don't screw it up. So thinking that I was going to be spending a lot more, I got out of there with a $4 investment.

Mind you, it could get easy to shell out a lot of cash there. Damn sticks of DOM, cleaned up gussets and tabs from cold rolled steel. On and on.

But as I was tooling around the aisles I found some of their cheapie tabs that will be perfect for mounting my pipes to the frame. So I will head back there soon.

There is also a machinist across the street from the supply place and I wandered in to see about getting my headstock machined. Seventy an hour is the shop rate, so I may have to wait on that for a few weeks, but I will take the pieces over next week and get a guesstimate on the work.

So I will try and get the pieces ready and if I get real adventurous I will try and repair the frame this weekend too. Hell if I get that frame done, it will be a bitchin' Father's Day gift for me.

Monday, June 11, 2007

I actually finished something???

Yes I did. And god damn does it feel good.

Tonight I finally got some grinder and welder time and cut up the cluster fucked mount I had made last week. I'll be honest, there is nothing like fucking something up to just take all the enjoyment right out of making stuff. I really had no motivation to even get onto the bike this weekend. So I cleaned up around here and drank beer.

But out of a sense of guilt and duty, I took the entire frame and mount to where I have been welding up this thing lately and got to work. Off went the old MIG weld for the mount bolts, and I took the heads off the carriage bolts that I had welded in. After I got that done I pulled out the gas rig and got to work.

100_0363

Me, the torch, and a hammer started getting everything tweaked back into place. A tack weld, smack it around some with the hammer to get it back in alignment, and another tack.

100_0365

After a bit I had both bolts in well enough to get them welded up and level. After the cool down I measured the bracket under the tank and pulled out the trusty MIG. A few welds later I had one simple and clean mount under the tunnel. The bolts are just barely visible from the side. I am not planning on cutting them off until I get everything mounted. I am thinking these will be perfect to hang the coils off of. Or perhaps to hold brackets for wiring. After I get situated, I will trim them to fit.

100_0362

Right now it is out on the patio coated in a thin layer of black primer and waiting for a heavier coat tomorrow.

Friday, June 08, 2007

Where is progress when you need it?

There are times I wonder where the hell did the saying "money isn't everything" come from. Surely didn't come from a broke fuck like myself.

I had hoped to get that mount bar cleaned up this week, but it never happened. I have pulled hours on a side gig pretty much all week. The money will be very welcome and is definitely needed. But man, it sucks when you can't turn it away. Well I guess I could turn it away, but that would be a stupid decision.

I guess I could take screenshots of the computers I have been messing with for the last few days, but that isn't the purpose of this blog.

So updates will probably come next Monday. I am aiming for a relatively relaxed weekend of screwing around on the tank and trying to get most of it ready for some welder time. And maybe if the deities smile down on me, I can actually keep some of the cash I earned this week.

Sunday, June 03, 2007

Damned long way to go.

I ran around last week and got a couple things done on the tank. But it is far from done.

Since I don't have a reserve petcock on the bike, I decided to make one of the side gauges out of clear tubing. Plus I like the way they look.

100_0360

There is my little helper. He had to be part of this photo set, so I put him to work.

100_0359

I also picked up the copper 90s from an Ace hardware. Those places are great for just about anything if you have some imagination.

So the top fitting was made from a galvanized reducer fitting I found. I took it and chopped most of the bell off and then cleaned off the galv from the fitting itself. Drilled the tank and welded it to the top of the tank. Perhaps someone is asking why I used a reducer when they also make couplers that would require less clean up. Honest fact it was $1.50 difference in price between the reducer and the coupler.

I wonder why the hell it would cost more for a straight section that is threaded all the way through, rather than the cast and tapered part. But there must be a logic to it.

Next week I am gonna try and get the mount set up. I did weld and twist the flat stock up, but it came out like crap. I am not happy with it at all. Granted it is gonna be hidden. But lopsided is not the effect I was looking for. Plus with the way it is twisted I am certain that it will make this a royal pain to get mounted under the tank properly. So I need to run the entire frame out to where I have been welding and get the welds and the steel cleaned up. And mount it while I have the frame for reference.

Hopefully I will get onto that Monday or Tuesday night.